Friday, June 20, 2014

Chicken Parma and Lemon Pilaf

This week I decided to try a recipe for an actual meal! I usually prefer to bake, since the ingredients in baking are all generally the same, and most of the time you don't have to deal with gross ingredients (like raw chicken!). This is one of my absolute favorite meals. My mom made it for me growing up, and about a year and a half ago I asked her for a recipe... The recipe she gave me was all over the place, giving me instructions out of order, and she didn't give me any exact amounts for the ingredients... so when I made it this time I just added ingredients until I thought the amount was appropriate. 
 Preheat the oven to 350 degrees
 Ingredients: 
Flour
Panko bread crumbs
White rice (I used instant cause I cheat)
Boneless skinless chicken breasts
Parmesan cheese
Chicken broth
Eggs
White wine
Salt
Pepper
Paprika
Turmeric
White pepper
Lemon juice
First do the gross stuff: cut each breast in half and cut off the icky bits from the chicken, then rinse them and set them on paper towels to dry 
Next, combine flour, paprika, salt, and pepper
 Combine eggs, paprika, salt and pepper
 And combine panko, paprika, salt and pepper
 Coat the chicken breast in the flour mixture

 Then dip into the egg mixture

 And then coat in the panko mixture

 Next put the coated chicken breast into a baking dish
 Repeat this process with the remaining chicken
 Next add chicken broth
 And white wine to the baking dish, until there's about 1/4 inch of liquid in the pan
 Next place slices of butter on top of the chicken, and top it off with the parmesan
 Cover with aluminum foil, place in the oven, and bake for ~50 minutes. Then I took off the aluminum foil and turned up the heat to about 475 and baked for an extra 10 minutes to toast the top
 For the rice, follow the normal rice instructions, but instead of using water use chicken broth, and add lemon juice, butter, and turmeric. In this case I added about a tablespoon of turmeric, which was a bit too much.

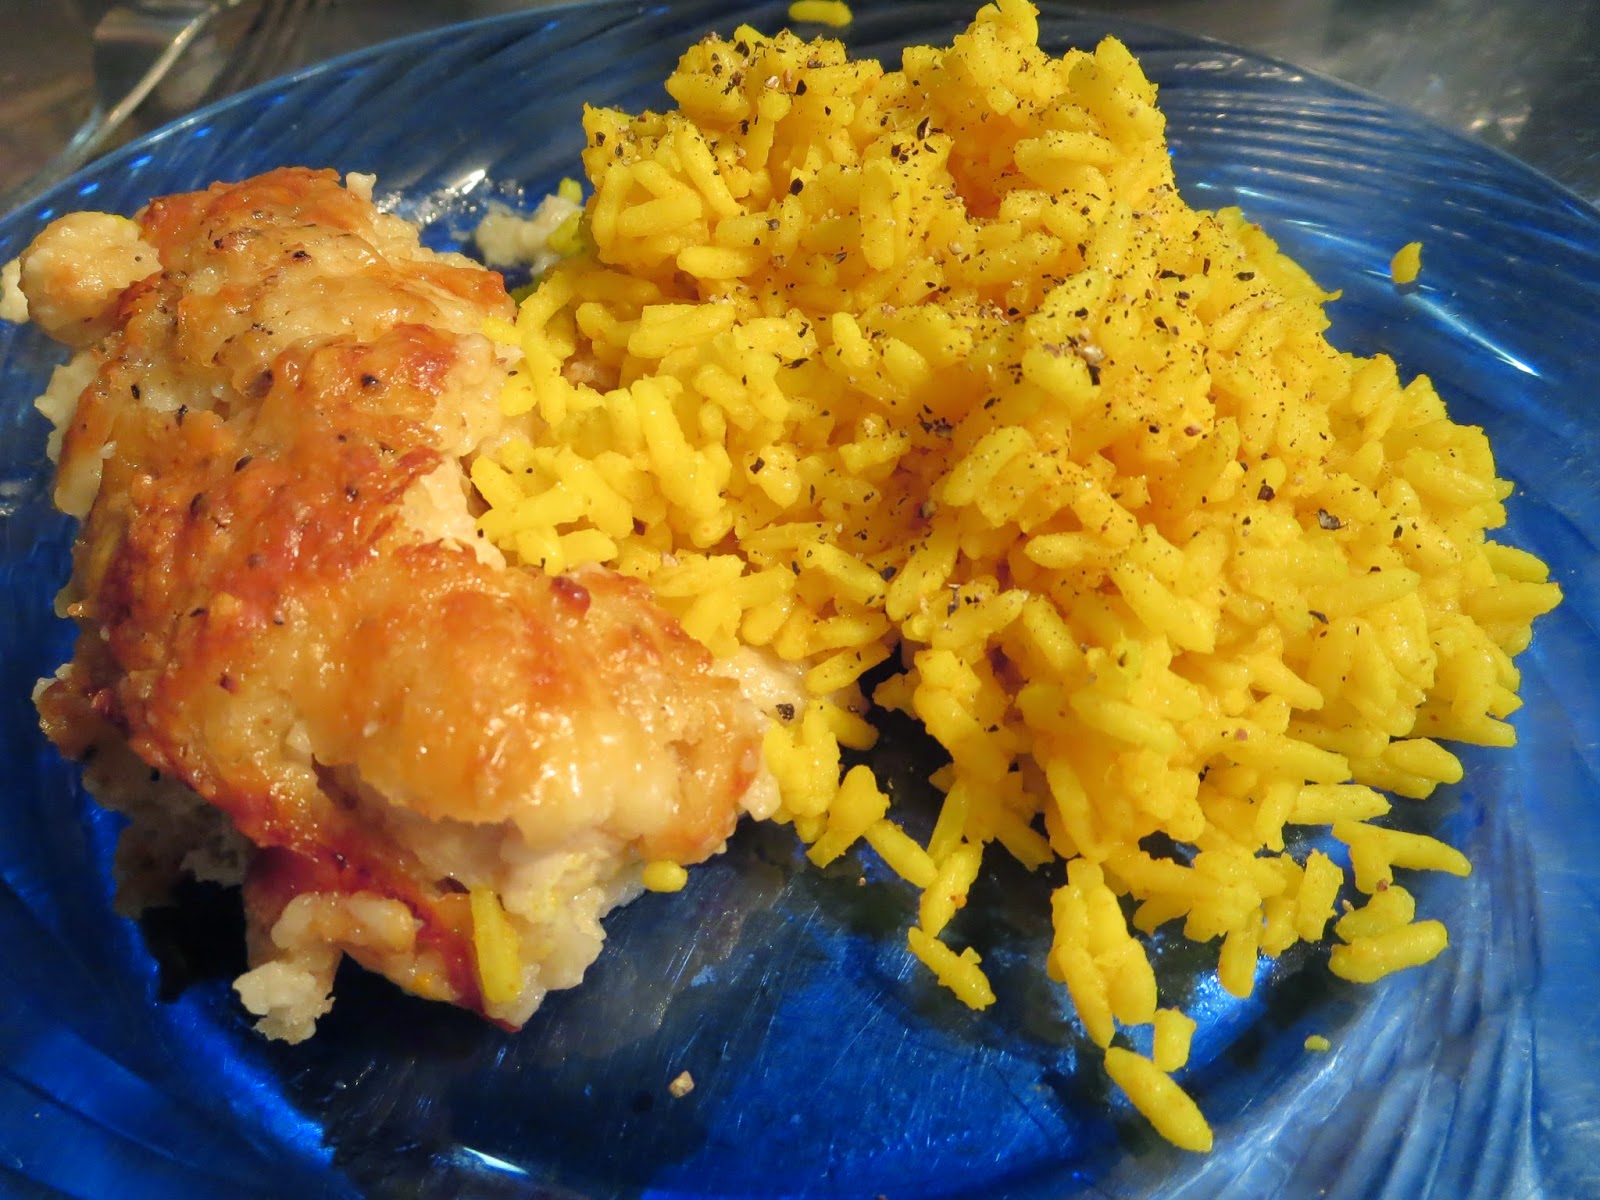
The finished product. 

This turned out pretty good, except I added a bit too much chicken broth to the pan, so the chicken was extra moist, which isn't exactly a problem... and the addition of too much turmeric, which made the rice a little intense, but still good. This is also awesome as leftovers. 

Lemon Brownies?!?


This recipe was originally found on Pinterest as "Lemon Brownies." I got the recipe from Bakerella, and I think when I found it it was also called Lemon Brownies but since then she's changed the title to Lemony Lemonies... I'm guessing she also had a problem with them being called brownies. I get it, since they're cake-like things that you eat as bars... but... doesn't hearing "lemon brownies" make you question the recipe? Anyway, I decided to make these because my friend Kenzi made them, only she didn't have powdered sugar so made the icing with granulated, which made for a crunchy topping. I was having a craving for something lemony, so I decided I'd try out the original recipe. 

Preheat the oven to 350 degrees.
 Our ingredients for the bars:
vanilla
1 cup flour
1 cup sugar
1/4 teaspoon salt
1/4 teaspoon baking powder
3/4 cup butter, melted and then cooled
2 eggs
3 tablespoons lemon juice 
Not pictured: 1 tablespoon lemon zest
 For the icing:
1 1/2 cups powdered sugar
2 tablespoons lemon juice
1 teaspoon lemon zest
 Combine the flour, salt, baking powder, sugar, and lemon zest

 Add the melted butter
 The lemon juice
 The vanilla
 And the eggs
 Stir until combined
 Pour into a greased pan
 Bake for ~25 minutes
 For the icing combine the powdered sugar, zest, and lemon juice


Once the cake is completely cooled spread on the icing.

I tried these immediately after I was done making them, and wasn't too impressed. They were definitely better the next day once the icing had a chance to harden a bit. They are good if you are looking for something easy and lemony, but they aren't the most amazing thing. I think what ruins it for me is the icing... I'm not a huge fan of the taste of powdered sugar, and with this type of icing you can really taste it... maybe it'd be better with something else... or I can always use granulated sugar like Kenzi :p

Sunday, June 1, 2014

Clarisonic Unboxing and First Impressions!

So, even though I was perfectly satisfied with the Olay Pro-X cleanser and wasn't willing to pay for a real Clarisonic, my mom happened to give me one as a gift, which is not only awesome for me, but also means that I can do a comparison to see if it's really worth the money! I'll use it for a few weeks, and will update this with an in-depth comparison of the two.

 I have the Mia 2, in a limited edition coral color. They don't sell this particular one from Clarisonic, but the most similar one is $150. 
 Before even opening the box, they have all of this "scientific" information about why cleaning your face with the Clarisonic is so much better than just washing your face.
 Breakdown of the features.
 And the actual unboxing. 
 First: the actual product. It's slightly larger than the Olay Pro-X. I really like that it comes with a brush cover, because if it's just sitting in the bathroom the brushes could become gross or damaged. Also, I would describe the color as more of a hot-pink than a coral.
 Included is the sensitive brush head. There are other types that you can buy, such as normal, acne cleansing, deep pore, and delicate. 
 Also included is a travel case, which seems super handy, but my first impression of this is that it's garbage. It feels like really flimsy plastic that nearly broke when I tried to open it.
And then I tried to actually put the Clarisonic in it, and it wouldn't shut... so we'll see how the travel case goes. 
 Charger bit.
 Other charger bit.
 The handy dandy user guide, which explains that you need to charge it for at least 24 hours prior to use but does not tell you how to use the newfangled charging doohicky. 
I looked up a video and figured it out... it's a weird magnetic charger that doesn't stay connected very well so needs to be in a place that won't get jostled. 

Initially, I think that there are some improvements that could be made to the components, but since I haven't actually used the thing yet, we'll have to wait and see if it's actually better than it's $20 competitor.